OK since we’ve delved into some project sin IntelliJ we’ll continue in that vein
Yes at some point well see how to package things and we’ll ship our HelloWorld killer app - but for now we need to learn to do some more normal UI things
The articles by @thorstenstueker show’d you how to do some things inIntelliJ lets move into more UI design
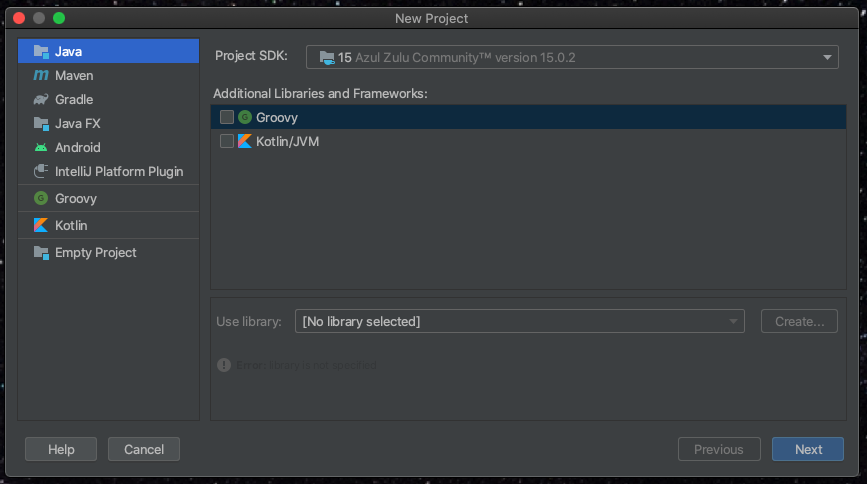
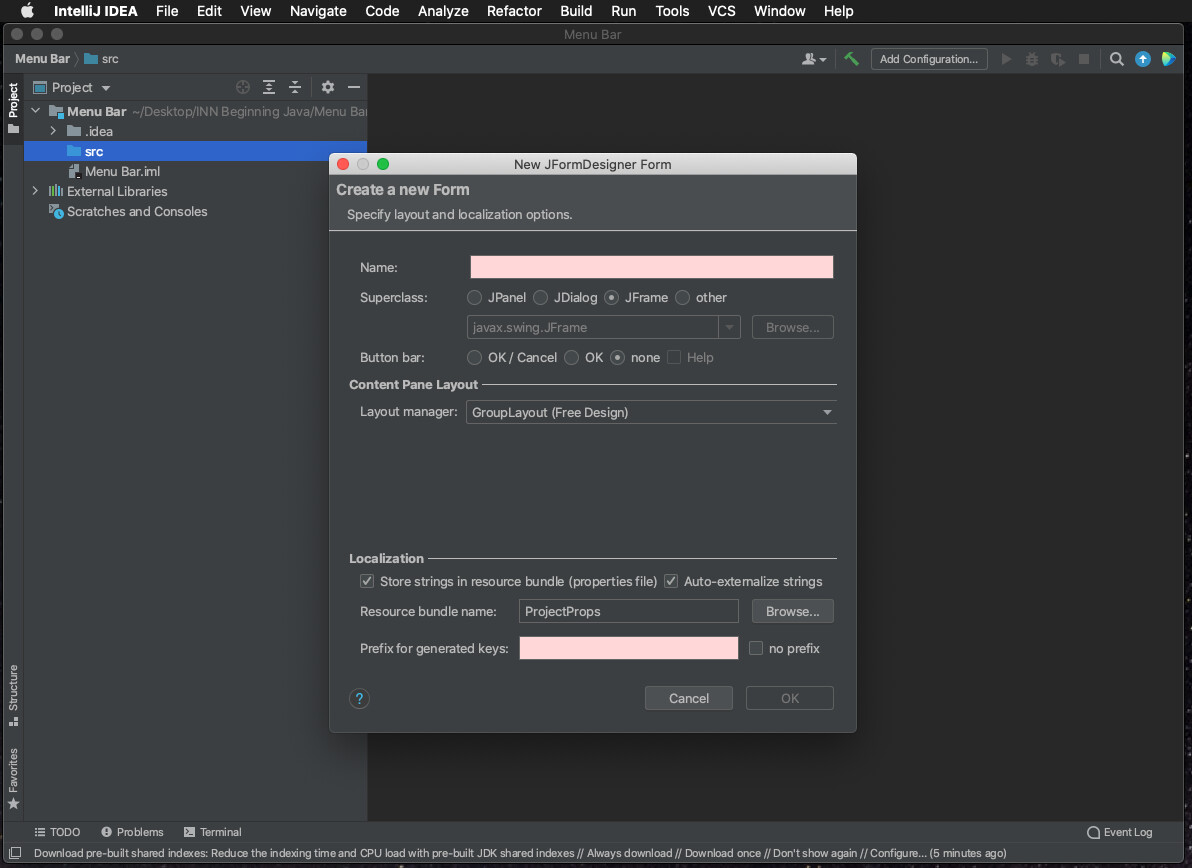
Start a new IntelliJ project


Right click on the SRC item in the project navigator on the left and add a new JFormDesigner form.
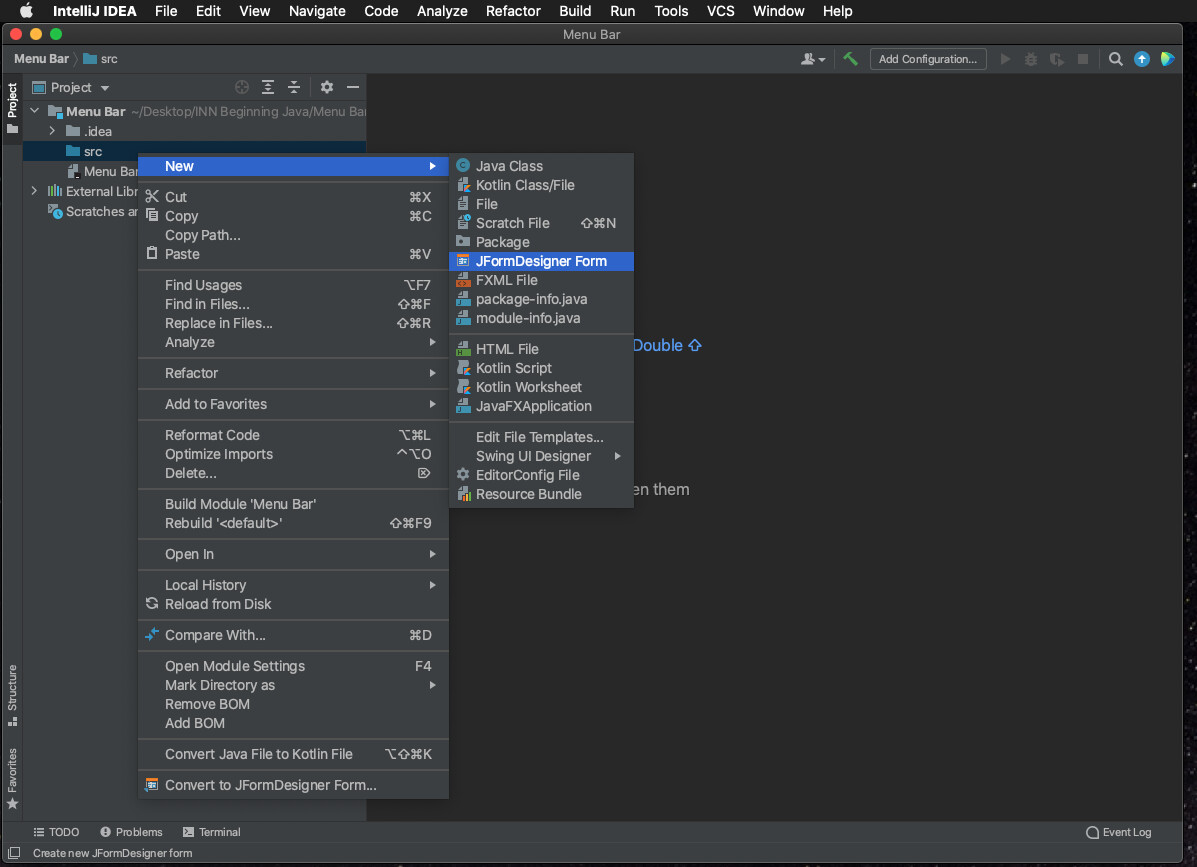
Make sure you make this items Superclass a JFrame ( a window)
Now you should see
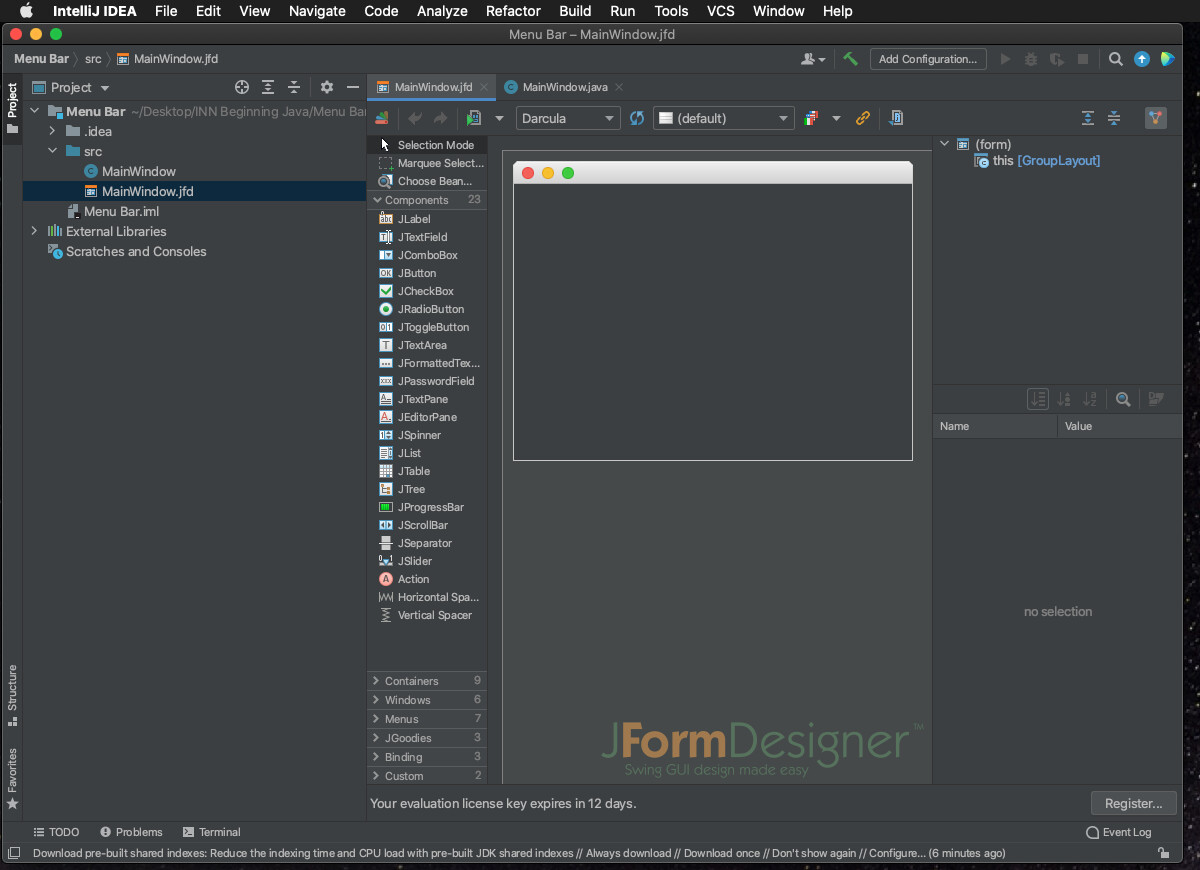
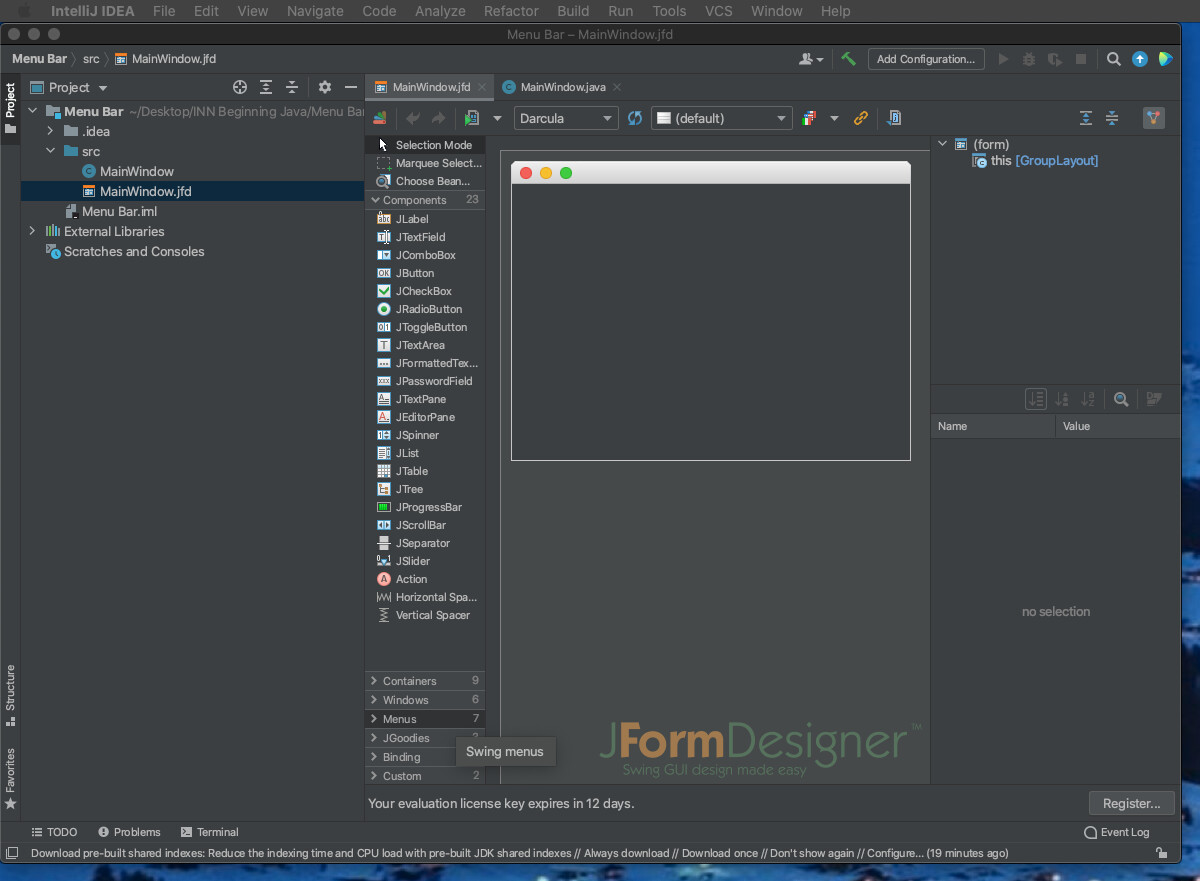
In the list of components to the left of the frame you should see several items listed - components, containers, windows, menus & several others.
Click in the one titled Menus to make it fold open
Now select JMenuBar and then click on the layout to place one on the layout. You do this a little differently than in Xojo - instead of click & drag - you click to select the kind of tool you are going to place, and then click to place one on the layout.
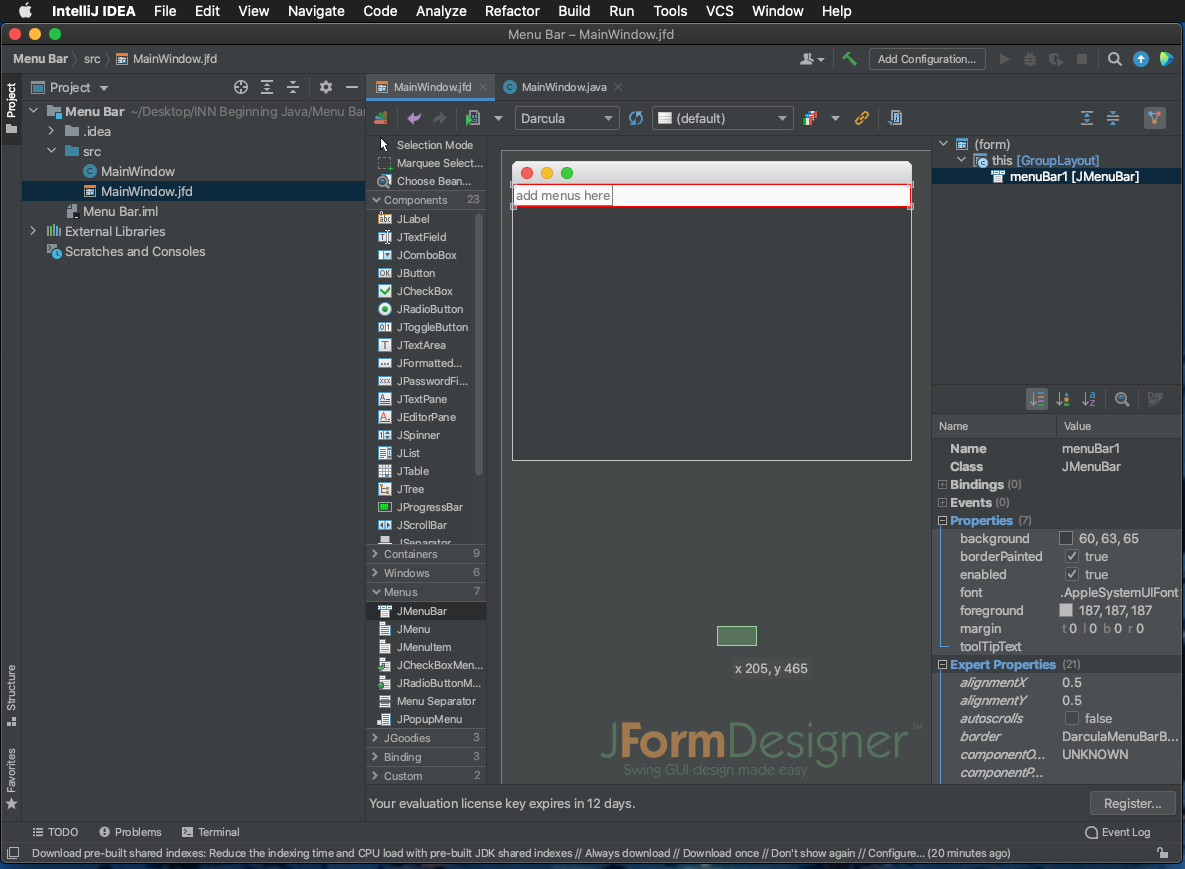
You add menus in much the same fashion by selecting the kind of component, this time a JMenu, then placing one under the menu in the menubar
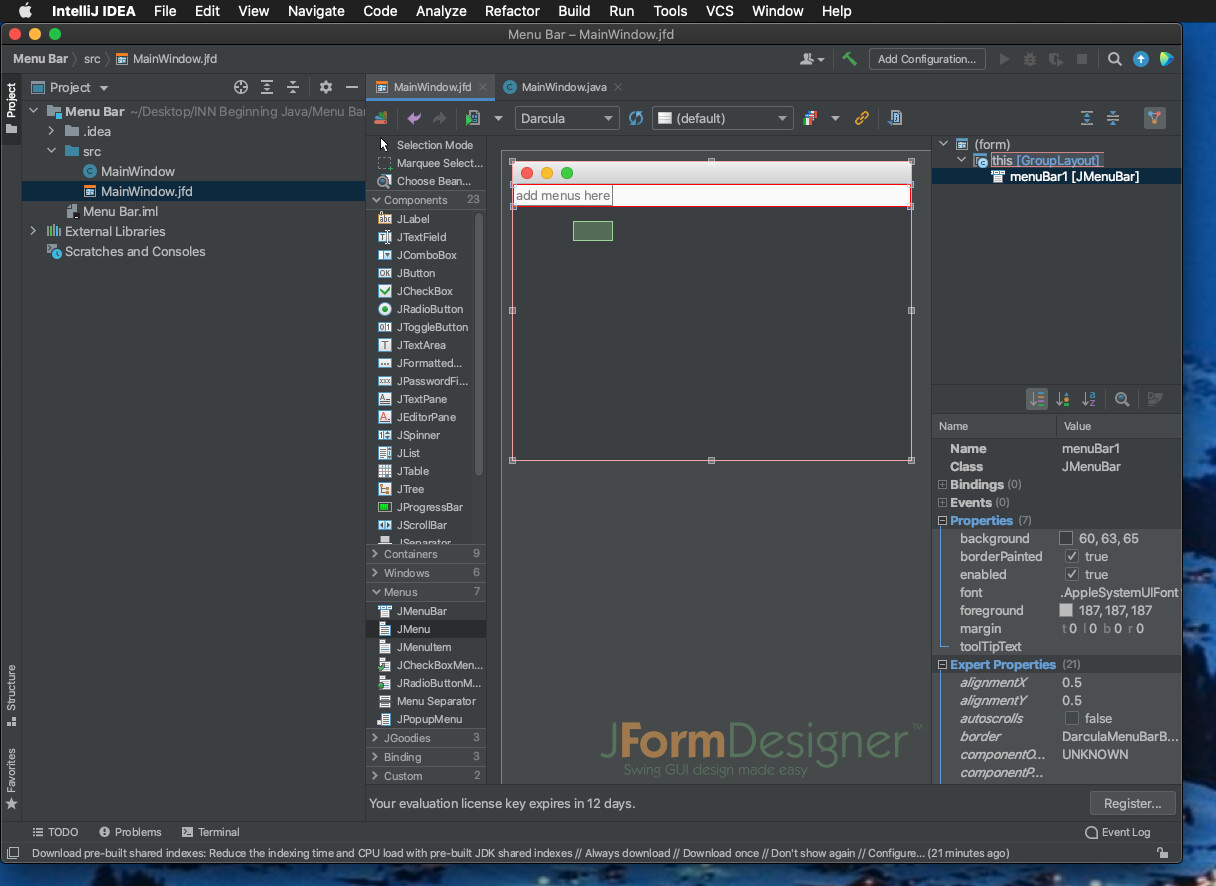
Add several.
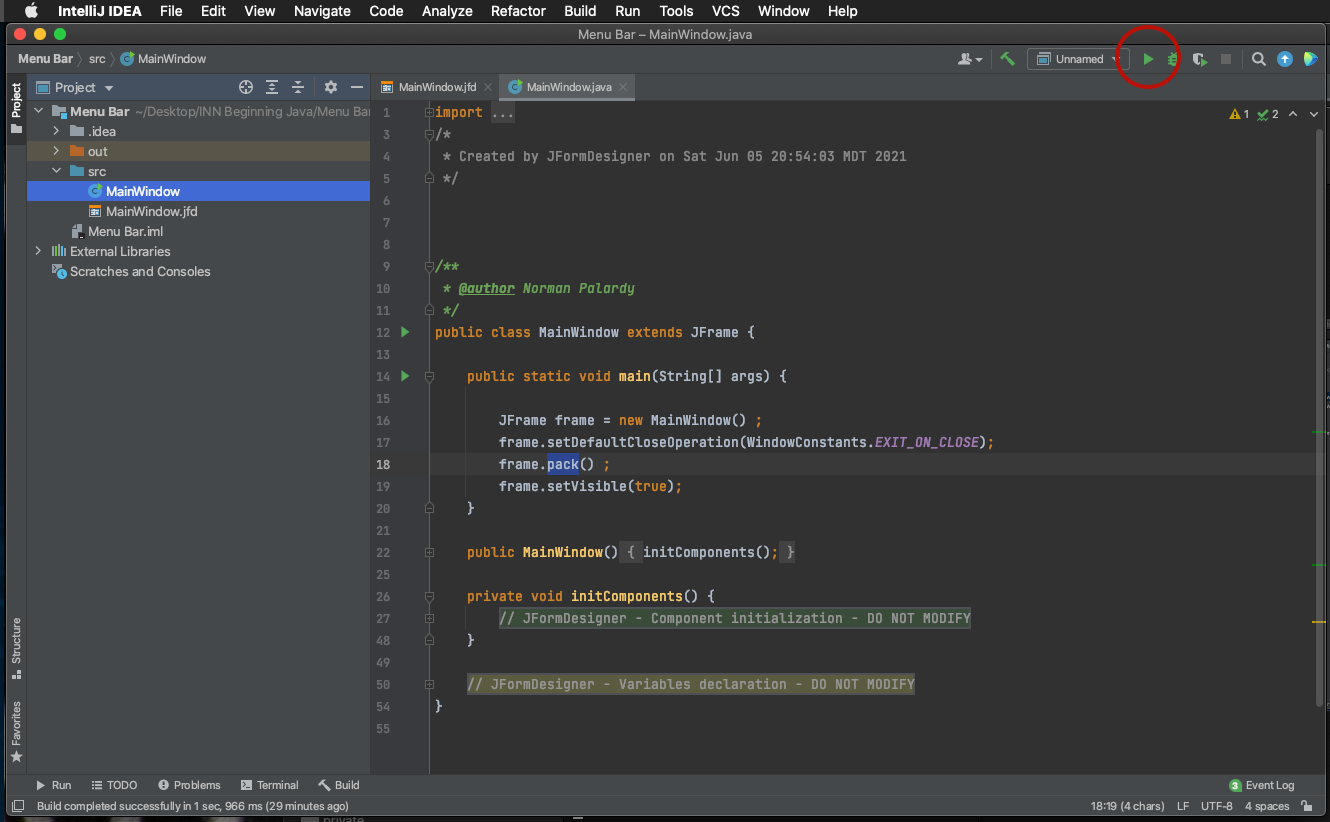
As we’ve been drawing our layout JFormDesigner has been writing the code for it in a companion Java file.
Make sure the Java file is open in a tab of its own. You can double click it in the navigator to open it.
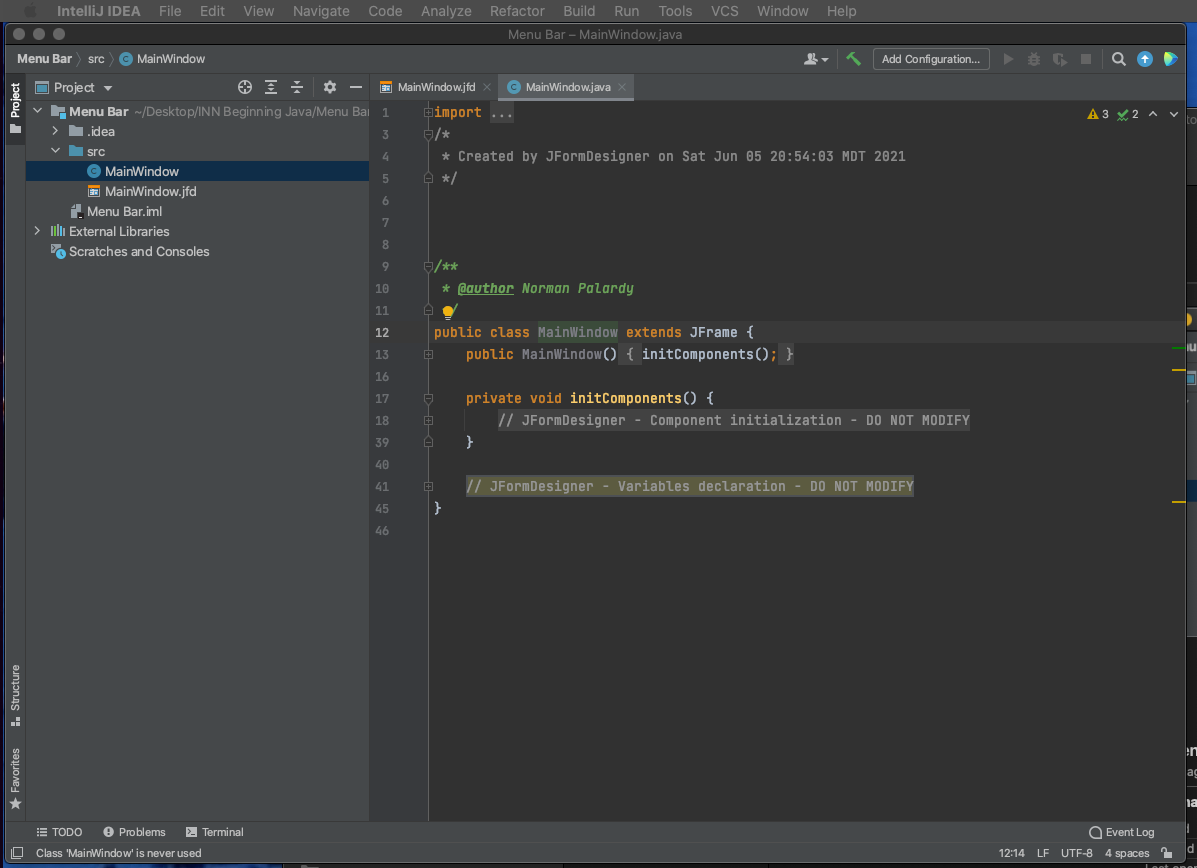
Since we’re still making just a simple app to demonstrate concepts we’ll make this a one window app so we’ll need a main entry point for the entire application.
Lets add that. Right after the initial public class MainWindow extends JFrame
public static void main(String[] args) {

        JFrame frame = new MainWindow() ;
        frame.setDefaultCloseOperation(WindowConstants.EXIT_ON_CLOSE);
        frame.pack() ;
        frame.setVisible(true);
    }
This code creates a new JFrame as an instance of the layout we designed
It sets what default behaviour to perform when its closed, resizes the window to an appropriate size, and shows it.
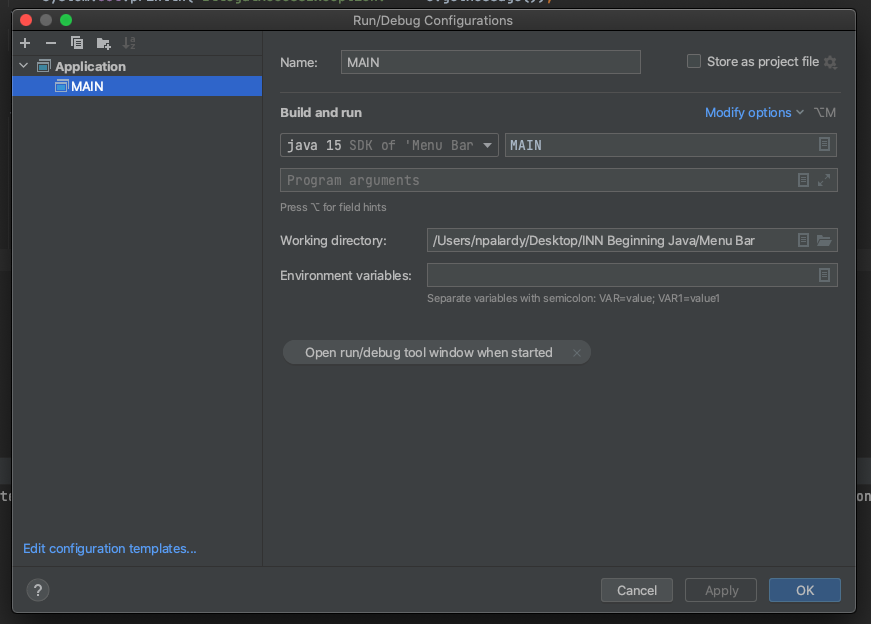
Now, to run, we need to add a testing configuration. In the upper right corner of the IntelliJ IDE you will see Add Configurations

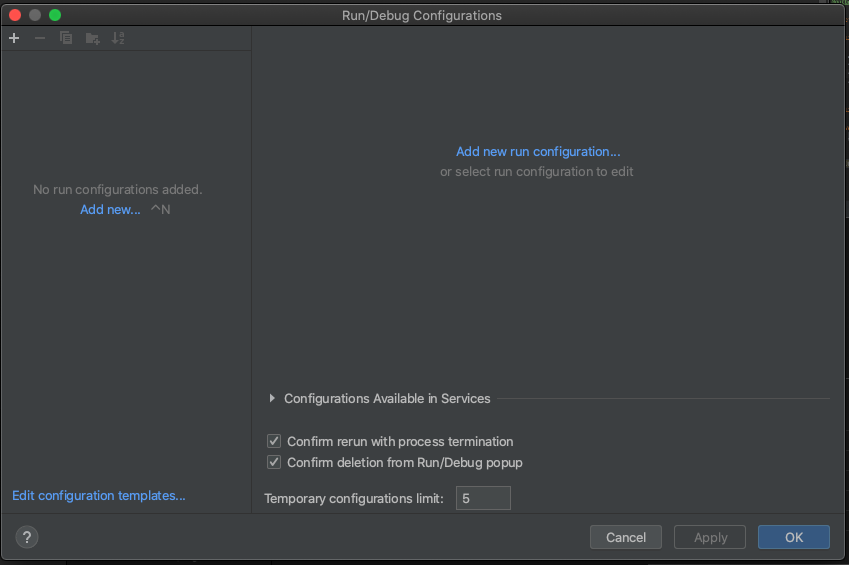
You can click on Add New in the left or right pane OR the + in the upper left
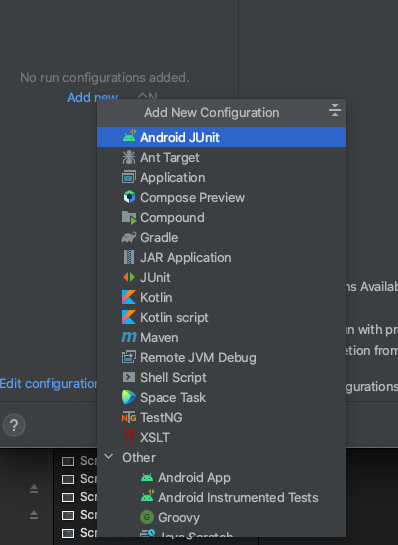
In the popup menu select Application
Name this configuration. It wont matter what as we’re only creating one for this sample.
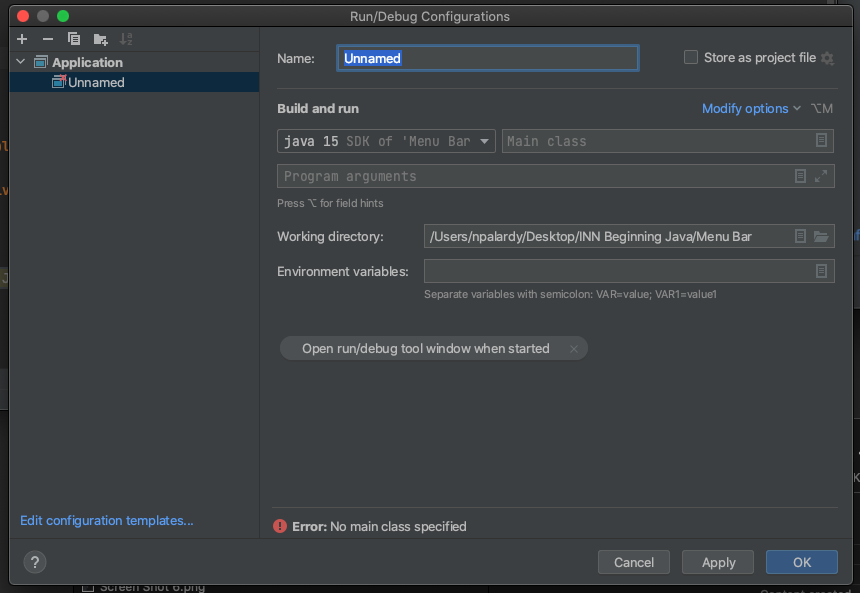
Most of the settings are already correct. The only one we need to adjust is the main class setting
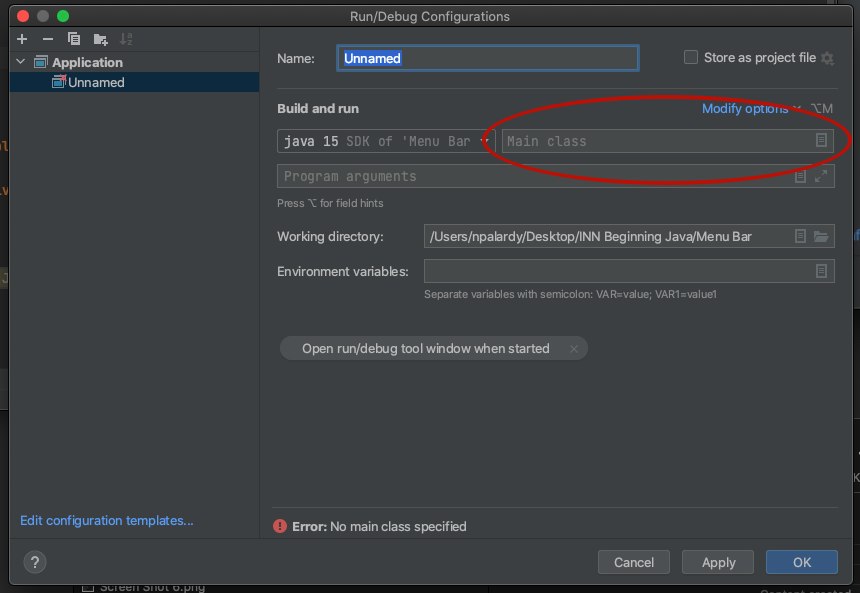
Click on that and classes with a public static void main method will be listed.
Since the only one is in MainWindow its the only one listed.
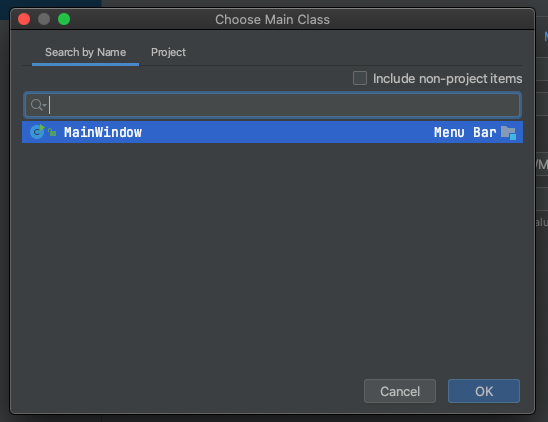
Select the MainWindow entry and press OK.
The second dialog will close and you can press OK again.
This will save the configuration.
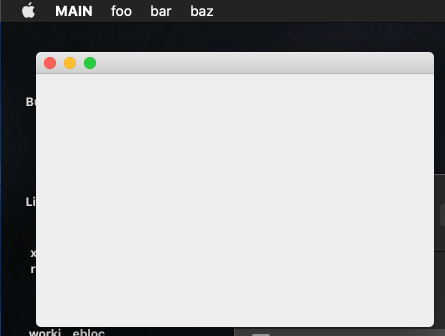
And now that there is a saved configuration, you should see the run option is enabled in the upper right as well
And, if you added several way back to experiment,

and run you should see something like
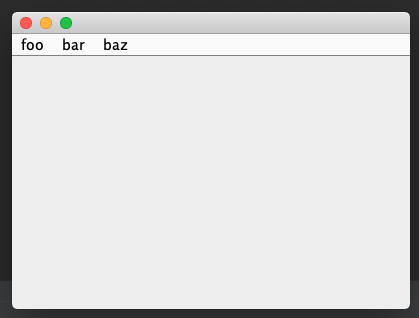
(Yeah it doesnt look right if you’re a mac user but we’ll work to fix that)
- I need to take a break but this post will be updated -
OK so how to fix the “not mac like” behaviour ?
We need to do a little work
First we need to change system configuration. But that only takes effect for thing that are not part of the current thread. (yeah java has real preemptive threads)
So what we need to do is change the config and then, later, start a new thread which will adopt this changed config.
So we’ll add a new Class - I named my MAIN
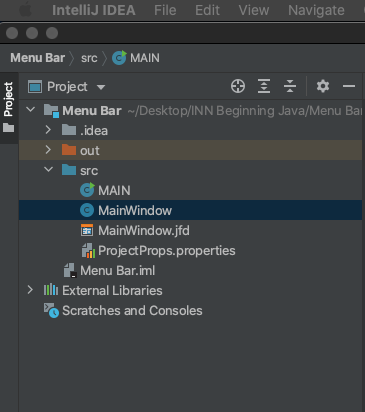
The other thing we re going to do is MOVE the public static main method from MainWindow into main
So you can cut that one out of MainWindow and paste it into MAIN.
We’ll need to modify a few things yet to get back to where we can run.
If you try right now you’ll find that it wont work as we configure the debug run to look for the main entry point in MainWindow (which we just cut out)
So lets fix that
Click on the configurations in the upper right.
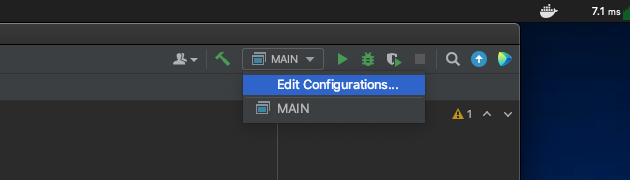
And click on MainWindow and select the new class that contains public static main which is now our new MAIN class
Now what we need to do is alter the main method so it reconfigures the runtime to put the menu bar in the right place.
The FIRST thing we need to d when starting up is the the runtime to put the mac menu bar in its normal place
Thats a single line like
System.setProperty("apple.laf.useScreenMenuBar", "true");
Then we need to start an instance of MainWindow in its own thread
The EASIEST way to do this is using something common to java, that xojo has NO equivalent for.
And anonymous instance of a class.
So in one line of code ( a rather long line ) we will
- create a new class ( of type Runnable)
- and define its Run method
- and invoke it “later” - effectively right away in reality
it looks like
       javax.swing.SwingUtilities.invokeLater(
            new Runnable() {
                public void run() {
                    JFrame frame = new MainWindow();
                    frame.setDefaultCloseOperation(WindowConstants.EXIT_ON_CLOSE);
                    frame.pack();
                    frame.setVisible(true);
                }
            }
        );
you can see
- we call
javax.swing.SwingUtilities.invokeLatero run something after a delay - new Runnable - this is our new instance of the Runnable class
public void run()which we follow with several lines of code that make up the Run method
careful with the () and {} pairings (which is why I posted this with this indentations style)
No with the Run configuration changes and code changes you should see
Something that looks a WHOLE lot more mac like !
Onwards !!!