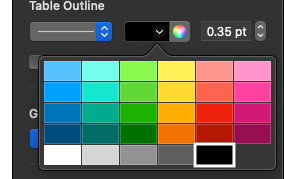
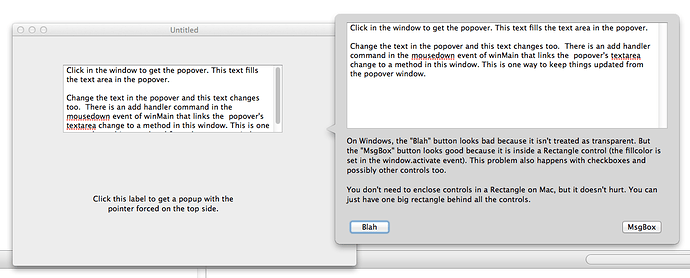
There are lots of handy declares on macOS to make a nifty little popover window that behaves a lot like the color picker in things like Numbers

This little tip is about how to make something that mimics that floater nice & simple and then you can extend it in whatever way you want.
I’m not going to go into how to make the entire color picker selector control but its not too difficult with a canvas. When you click the right hand color portion with the color wheel the normal color picker gets shown. And when you click the left hand side it brings up the little prefilled palette picker.
One of the nice things the Numbers Color Picker does is pop up and when you select a value it disappears. Or if you just select a different cell in the spreadsheet it also closes.
We can make a cross platform selector thats a lot like thins pretty simply in Xojo.
Start by creating a new desktop project
Add a new Window and rename it popupWindow
Make the frame type a plain box and turn off the close button, maximize & minimize buttons.
You can make this window resizable or not - thats entirely up to you
Also set the title to a blank string (no contents whatsoever)
Turn off Visible as we want the window to be invisible when created and we’ll show it later after positioning it
And turn implicit instance off (we’ll need it off for this to work decently)
Now on the original window in the project lets start putting some testing code in place
Lets add a push button to the window
The name of it really doesnt matter
In the pushbutton action we’re going to make the popup show up right below the popup button
Lets start with code like
  dim popup as new popupWindow

  // for the astute reader you'll note there is an issue with this code
  popup.top = me.top + me.height
  popup.left = me.left

  popup.Showmodal
And then save your code (save early and often!)
And give this a try - it should all run but probably wont behave quit the way you want just yet
There are a couple problems
- if you click outside the window it doesnt get dismissed as we really want. Its still there and open.
- the positioning is way off
Lets tackle the first one
To make the window close when we click else where OR when we click on “something” in the contents is pretty simple.
Lets implement the deactivated event for the case where someone clicks outside the window.
We’ll just close our little popup in that case.
Add the Deactivate event and in there put
self.closeNow when you deactivate this window it will close itself. Exactly as we wanted.
And for the case where it reacts and closes when something is clicked we’ll use the MouseDown and MouseUp events
Add both of those events
In MouseDown put
return trueAnd in MouseUp we once again have
self.closeSave (always save !) and Run again
While the positioning is still off when you click either in the window or elsewhere things behave as expected.
At this point you can now popup that window - its just poorly positioned.
And you can get any values back from the window to know if a person selected a color od something else.
By adding a couple properties to our popupWindow you can easily make it so when it closes you can then
do some additional processing.
In the case of the color selector popup a click in the content area (the mouse down and up ) simply sets
a color property and a boolean - didSelectColor
The deactivate event simply sets the didSelectColor boolean to false
Lets change the popup to do that
Add a public boolean property, didSelectColor, to popUpWindow.
As well add a public color property, selectedColor, to popupWindow
Alter the deactivate event of popupWindow to
  didSelectColor = false
  self.close
And the mouseUp event to
  didSelectColor = true
  self.close
Eventually we’ll need to add some code to decide what color was selected etc but for now we’ll just
indicate that a color was selected and the mechanics of how to decide what color can be filled in later
Then in our pushButton we can alter the code to
  dim popup as new popupWindow

  // for the astute reader you'll note there is an issue with this code
  popup.top = me.top + me.height
  popup.left = me.left

  w.ShowModal
  If w.didSelectColor Then
    MsgBox "selected a color !!!!!!"
  Else
    MsgBox "couldnt decide ?"
  End If
Save (always save !) and Run again
Now when you deactivate the window but clicking outside its bounds you get the “Couldnt decide?”
message and when you click the window you get the “Selected a color” message
To make a grid of selectable colors we could use a grid of canvases and then in each canvas mouse up and mouse down do much the same as we have in the windows mouse down and mouse up events.
At this point its trivial to do.
The only big bugaboo is to fix the positioning - and this affects all kinds of things that require global coordinates and not local ones.
What do I mean by that ?
When you open and position a window on screen its “top and left” are in screen coordinates. They are
“global” to the entire screen area available.
But when you position a button or other control on a window layout those positions are relative to the top left of the window (more on this in a bit) This is handy for moving controls or layout as you dont need to, or want to, think about “this should be at position 500,500 from the top left of the screen” In fact doing so would make it impossible to work because as soon as you moved a window its controls would need to be adjusted in absolute terms.
But this also explains why our initially simple for didnt position our new popup window correctly.
When we wrote
  popup.top = me.top + me.height
  popup.left = me.left
the popup is a Window and needs GLOBAL coordinates and ME in this case is a control and those
coordinates are relative to the top left of the window. And here we dive into what do a Windows top,
left, width and height ACTUALLY refer to ?
Windows have a “bounding rectangle” - the rectangle that encloses all of the window and, on Windows,
the menu bar, the title bar and all the window frame. Tne same is true on macOS and Linux.

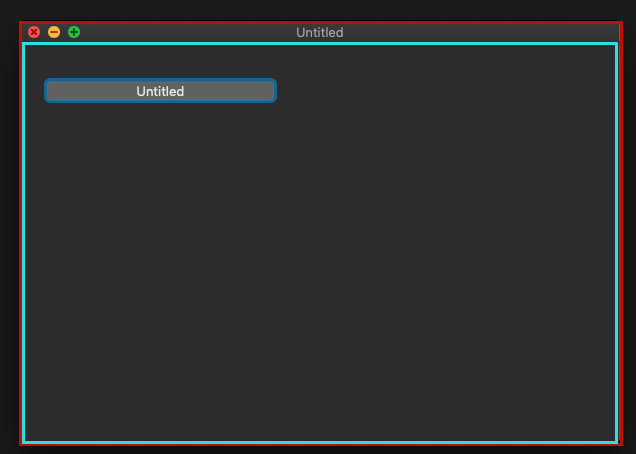
In the image the red rectangle represents the bounding rectangle
And the inner light blue one the “content area”
When you put a control on a layout its position is relative to the top left of the CONTENT AREA
(starting at 0,0)
So in Xojo the TOP and LEFT of a Window refer to the CONTENT area, NOT the bounding rectangle.
Sometimes this doesn’t matter but when you’re trying to position a Window it can matter a lot.
If you set top = 0 then the title bar and other window adornments that are above that may be tucked up under the menu bar on macOS. Or they could be positioned offscreen on Windows.
Not really friendly.
So for positioning our little window we need to use the BOUNDS which is the enclosing frame rectangle NOT the content area. Lets alter our code a bit in the pushbutton to use this newfound knowledge.
  dim popup as new popupWindow

  dim popupBounds as REALbasic.Rect = popup.Bounds

  // for the astute reader you'll note there is an issue with this code
  popupBounds.top = me.top + me.height
  popupBounds.left = me.left

  popup.Bounds = popupBounds

  popup.Showmodal
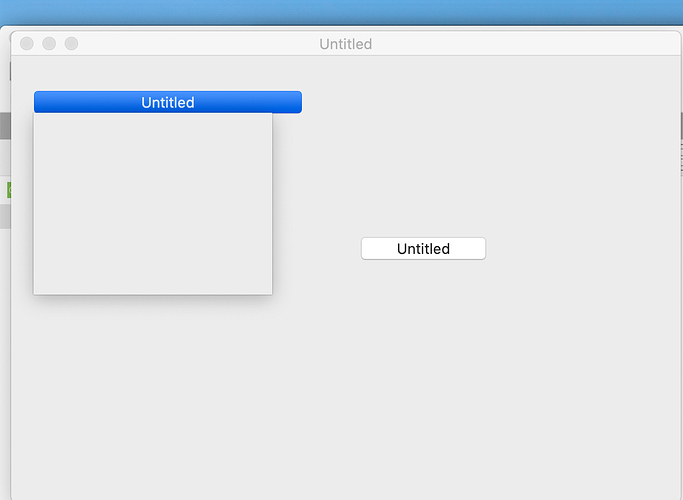
Now ehen you run this you’ll see a different - but its still not right.
The new BOUNDS we’re calculating are still in local coordinates relative to the top left of
the window and the position of a window needs to be stated in global coordinates.
We need to take the controls position, and add the windows top and left and that gets where we wanted.
This time ![]()
When you put a control inside a container control you have a similar issue and you have to account
for the fact that each level you embed is offset from the container as if it was 0, 0.
In fact to get the GLOBAL left and TOP for a control when its in a container many levels deep
you need to walk up through each parent accumulating the left and top as offsets from the Windows
left and top.
We can add a couple of extension methods to handle this simply.
Add a module and name it RectControlExtensions.
I chose names like this so its immediately obvious whats in them. This one would, in my world,
contain ONLY RectControl extension methods.
To this we’re going to add two methods - GlobalLeft and GlobalTop
Each will, for the control referenced, figure out the Global top or left by walking up the
containment hierarchy. Fortunately when you put one control inside another, like a button inside a canvas,
the positioning of the inner control is stil relative to the top left and not to the control it is parented in.
  Public Function GlobalLeft(extends r as rectControl) as double
    Dim retValue As Double = r.TrueWindow.Left + r.Left

    Dim p As RectControl = r.Parent
    While p <> Nil
      retValue = retValue + p.Left
      p = p.Parent
    Wend

    Return retValue
  End Function
Public Function GlobalTop(extends r as rectControl) as double
Dim retValue As Double = r.TrueWindow.Top + r.top
Dim p As RectControl = r.Parent
while p <> nil
retValue = retValue + p.top
p = p.Parent
Wend
Return retValue
End FunctionNow that we have added these to our application all our code, in any place, can look like
  Dim popup As New popupWindow

  Dim popupBounds As REALbasic.Rect = popup.Bounds
  Dim selfbounds As realbasic.rect = Self.bounds

  popupBounds.top = Me.Globaltop + Me.height
  popupBounds.Left = Me.GlobalLeft

  popup.Bounds = popupBounds

  popup.Showmodal

  If popup.didSelectColor Then
    MsgBox "selected a color !!!!!!"
  Else
    MsgBox "couldnt decide ?"
  End If
And, except for a weird issue on Windows, we’re done and this little popup window works cross platform.
To deal with the issue on Windows we need to make the self.close NOT happen in the events themselves but in a really short period timer.
The simplest way to do this is to, on our popupWindow, drag a timer onto it.
Rename it selfCloseTimer.
Set its Mode to “OFF” and its period to 1.
Add its action event and out this code in it
self.closeThen popupWindows Deactivate needs to get changed to look like
  didSelectColor = False

  selfCloseTimer.Mode = Timer.ModeSingle
And popupWindow.MouseUp can look like
  didSelectColor = True

  selfCloseTimer.Mode = Timer.ModeSingle
And there you have a handy dandy starting point for a popup window that will work cross platform !
EDIT : Sample Project added
EDIT II : updated link


